Kombucha Tips and Tricks
May 13th 2017
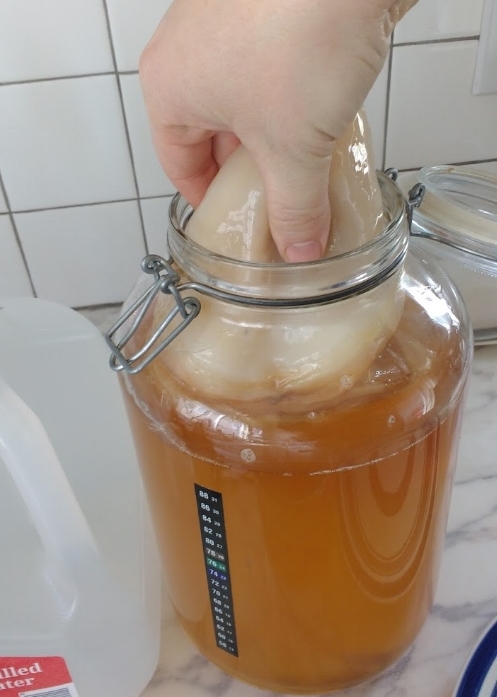
Removing the kombucha SCOBY from the jar after the first week of fermentation.
In an ongoing effort to share with our customers different ways to enjoy our teas I have for you some tips and tricks on how to brew kombucha. One of our staff members, the lovely Andrea, brews kombucha at home using several of our teas as the basis for her delightful concoctions. I sat down with her the other day to learn a bit more about what she does to achieve such delicious results. Having only dabbled briefly in making kombucha myself, I learned a lot of new information and some really helpful tips and tricks.
As its basis kombucha uses brewed tea, sugar, and a SCOBY( symbiotic 'colony' of bacteria and yeast) to make a slightly sweet, fizzy, and tangy fermented beverage. There are many different recipes out there to follow and try out from the very basic to the fairly complicated. When I asked Andrea what some of her favorite teas to use are, this was her list: English Breakfast, Ceylon, Tranquility, Caravan, Haiku, Cocoa Deluxe, Dancing Dragon, and Jasmine Peony. These teas run the range of being fairly simple to fairly flavorful and bold.
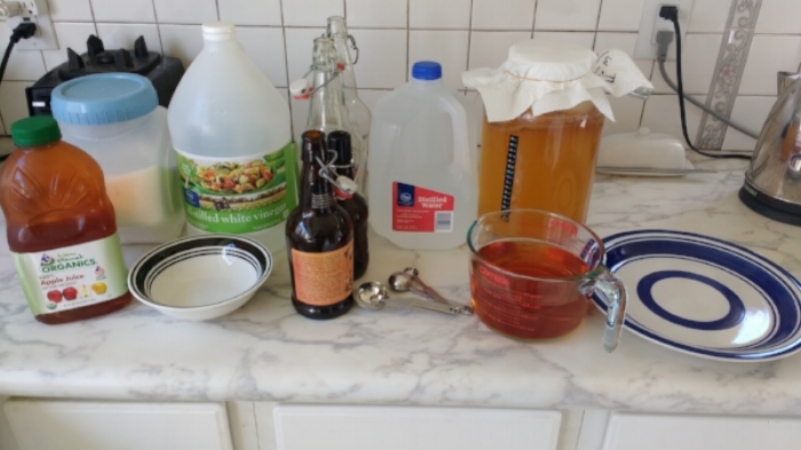
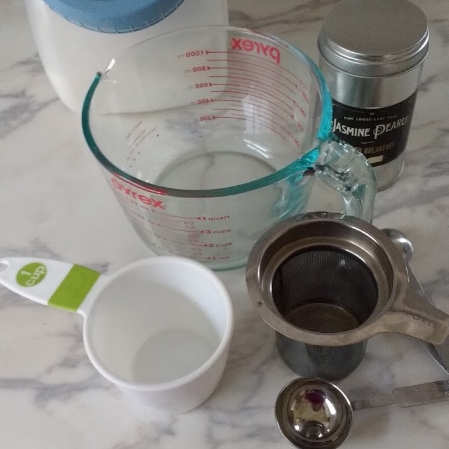
Some of the tools and supplies Andrea uses for making kombucha.
After choosing your base tea the options continue to be fairly limitless. Andrea likes to ferment her kombucha about a week in a large glass gallon jar before she removes the SCOBY mother to get another batch started. She puts her brew into swing top/grolsch style bottles. The clamping lids form a great seal. To this first ferment Andrea likes to add a variety of things like juice, sugar, ginger or other herbs, or flavorings.
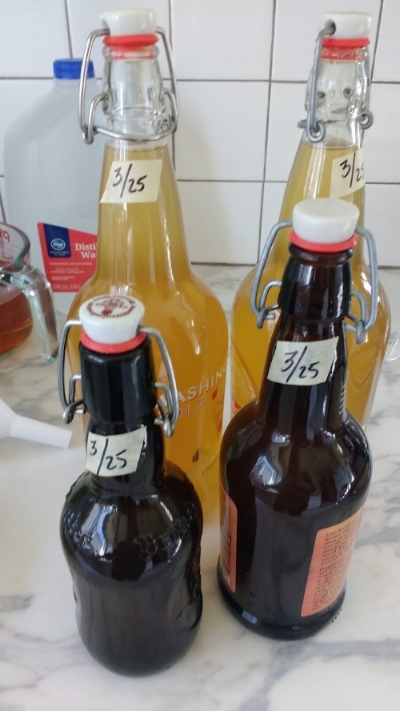
Swing top / Grolsch style bottles
These additions impact the flavor and fizziness levels of the final brew. Adding in sugar/juice to this first ferment is the secret to getting a fizzy bubbly brew. The little bacterias and yeast present in the kombucha love eating sugar and go wild with sugary additions to the first brew. Be careful though as Andrea warns that some juices like apple juice are fairly sugary so she uses less so that she doesn't have too much pressure and fizz building up. Certain other juices or flavors like blue berry or pomegranate juice or ginger are best used sparingly as they taste quiet powerful and can overwhelm a kombucha brew if you aren't careful. Andrea likes to let the brew sit and ferment for about another week. After that it is ready to be put in the fridge and consumed!
This is a schedule that works well for Andrea. It allows her to have a batch brewing, another going through its 2nd fermentation, and a final finished batch that can be drunk.
There were several warnings that Andrea had to give. The biggest being what to avoid using during the first fermentation. The SCOBY mother is a living bacterial/yeast organism, therefore you must be cautious. The SCOBY does not like:
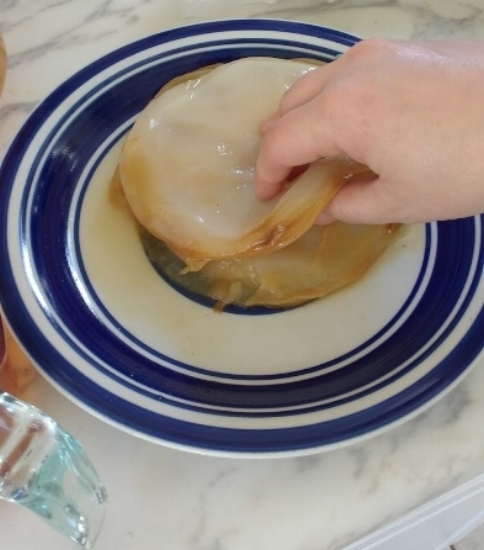
The SCOBY out of the jar. A big gelatinous mass, the SCOBY will continue to grow and reproduce. Occasionally its good to take off some of the layers so it doesn't get too big. Give the SCOBY babies to friends to start their own kombucha!
Ginger-Ginger can be added to your brew like I mentioned above, but only after the SCOBY has been removed. Make sure you only add ginger once you are ready to start the 2nd fermentation phase.
Metal- Make sure that you avoid letting the SCOBY come in contact with metal. Use glass jars, and wooden stirring utensils as much as possible when making Kombucha. Metal measuring spoons or tea infusers are ok to use, just make sure the SCOBY itself doesn't touch the metal.
While you can brew your tea in a metal strainer make sure that the majority of your tools and any brewing vessels are glass or plastic.
Soap- If you need to clean your glass jars or wooden stirring utensils then using plain old white vinegar does wonders. Even the soap on your hands can be detrimental to the SCOBY so be sure to wash/dip your hands in some vinegar too, it'll also help you find all the nicks and cuts on your hands!
Chlorinated water- Andrea avoids using tap water as that can be chlorinated. Instead she uses spring water or distilled water.
High temperature water- To make sure the brew isn't too hot for the SCOBY she simply lets the brewed tea and sugar mixture sit and cool down for 20-30minutes before adding in the SCOBY. She then just sits her brewing jar on the counter in an area that doesn’t experience extreme temperature changes, aka not next to the stove.
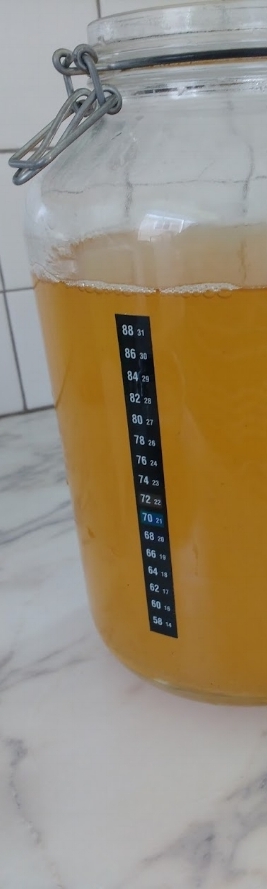
Another handy tip: Use a stick on thermometer to help gauge the temperature of your brew.
One other interesting thing to note about the SCOBY. Since it is a living organism it feeds off the tea and sugar present in the kombucha. As it feeds it grows and gets bigger. Occasionally its good to take off some of the layers so it doesn't get too big and take over your jar. Give these SCOBY "babies" to friends to start their own kombucha! Or you can cook with and eat the SCOBY. Or you can even dry it out to form a "leather" like substance that can be made it clothing or accessories (check out Suzanne Lee to see some cool stuff!).
Interested in getting more in depth knowledge on kombucha brewing?
Here are a few links:
http://www.lionheartkombucha.com/kombucha-brewing
https://www.mynewroots.org/site/2016/07/brew-your-own-kombucha
Want hands on learning? We have a workshop coming up with Jared Englund, the owner of Lion Heart Kombucha. It will be on Saturday June 10th from 11:30am-1pm here at the Jasmine Pearl in our event space. For $40 you will receive a starter kit and the hand-on knowledge you need to brew Kombucha at